Parametric 3D design
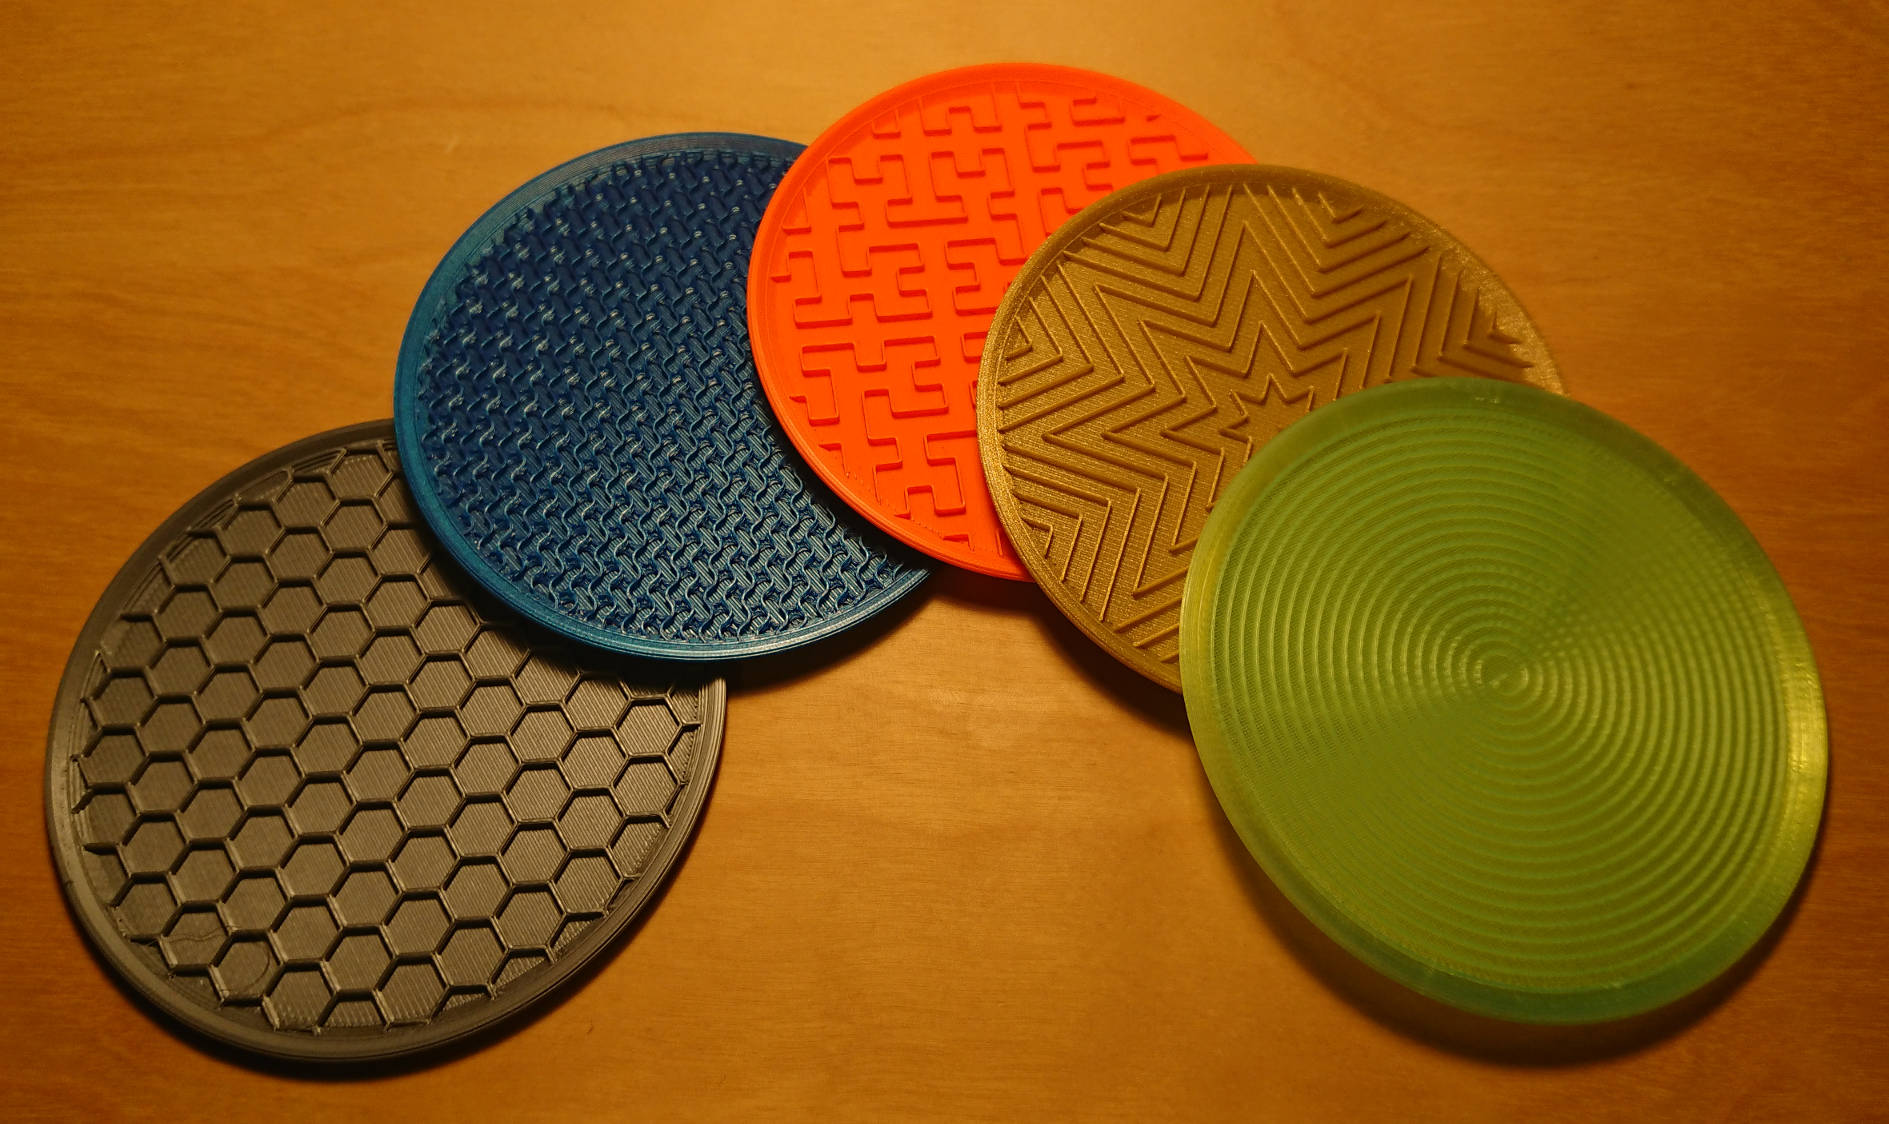
I mentioned in my last post that we’d had a 3D printer at work for a couple of months. In that time there’s been a lot of hype and printing, with many custom designs floating around. Most of my colleagues have used TinkerCAD, but I’ve had a lot of fun (and some headaches) with OpenSCAD.
What is OpenSCAD?
OpenSCAD is a scripting-based 3D modelling package. While it has a render view, unlike most other modelling packages you’re not able to drag around parts or edit them graphically: everything has to be done through the code. If you’ve ever had to typeset scientific documents, you may be familiar with LaTeX — a good comparison (in my opinion) is that OpenSCAD is the LaTeX of the modelling world.
It’s definitely harder to get started with than other modelling software, but the scripting nature really appeals to me. I like the ability to put the code into Git for version control, and that I can completely adjust my models in seconds just by changing a few key parameters.
This means that I could in theory spend a bit more time making the model so it is customisable, but then just generate as many different output files in whatever configuration is desired for family and friends.
What have I modelled?
E3D V6 nozzle
The E3D V6 nozzle is the tip of the hot-end used in Prusa i3 MK3 3D printers. It’s a pretty iconic shape, and the mechanical drawing is freely available online. This made it a pretty good practice piece for me to use while learning OpenSCAD.
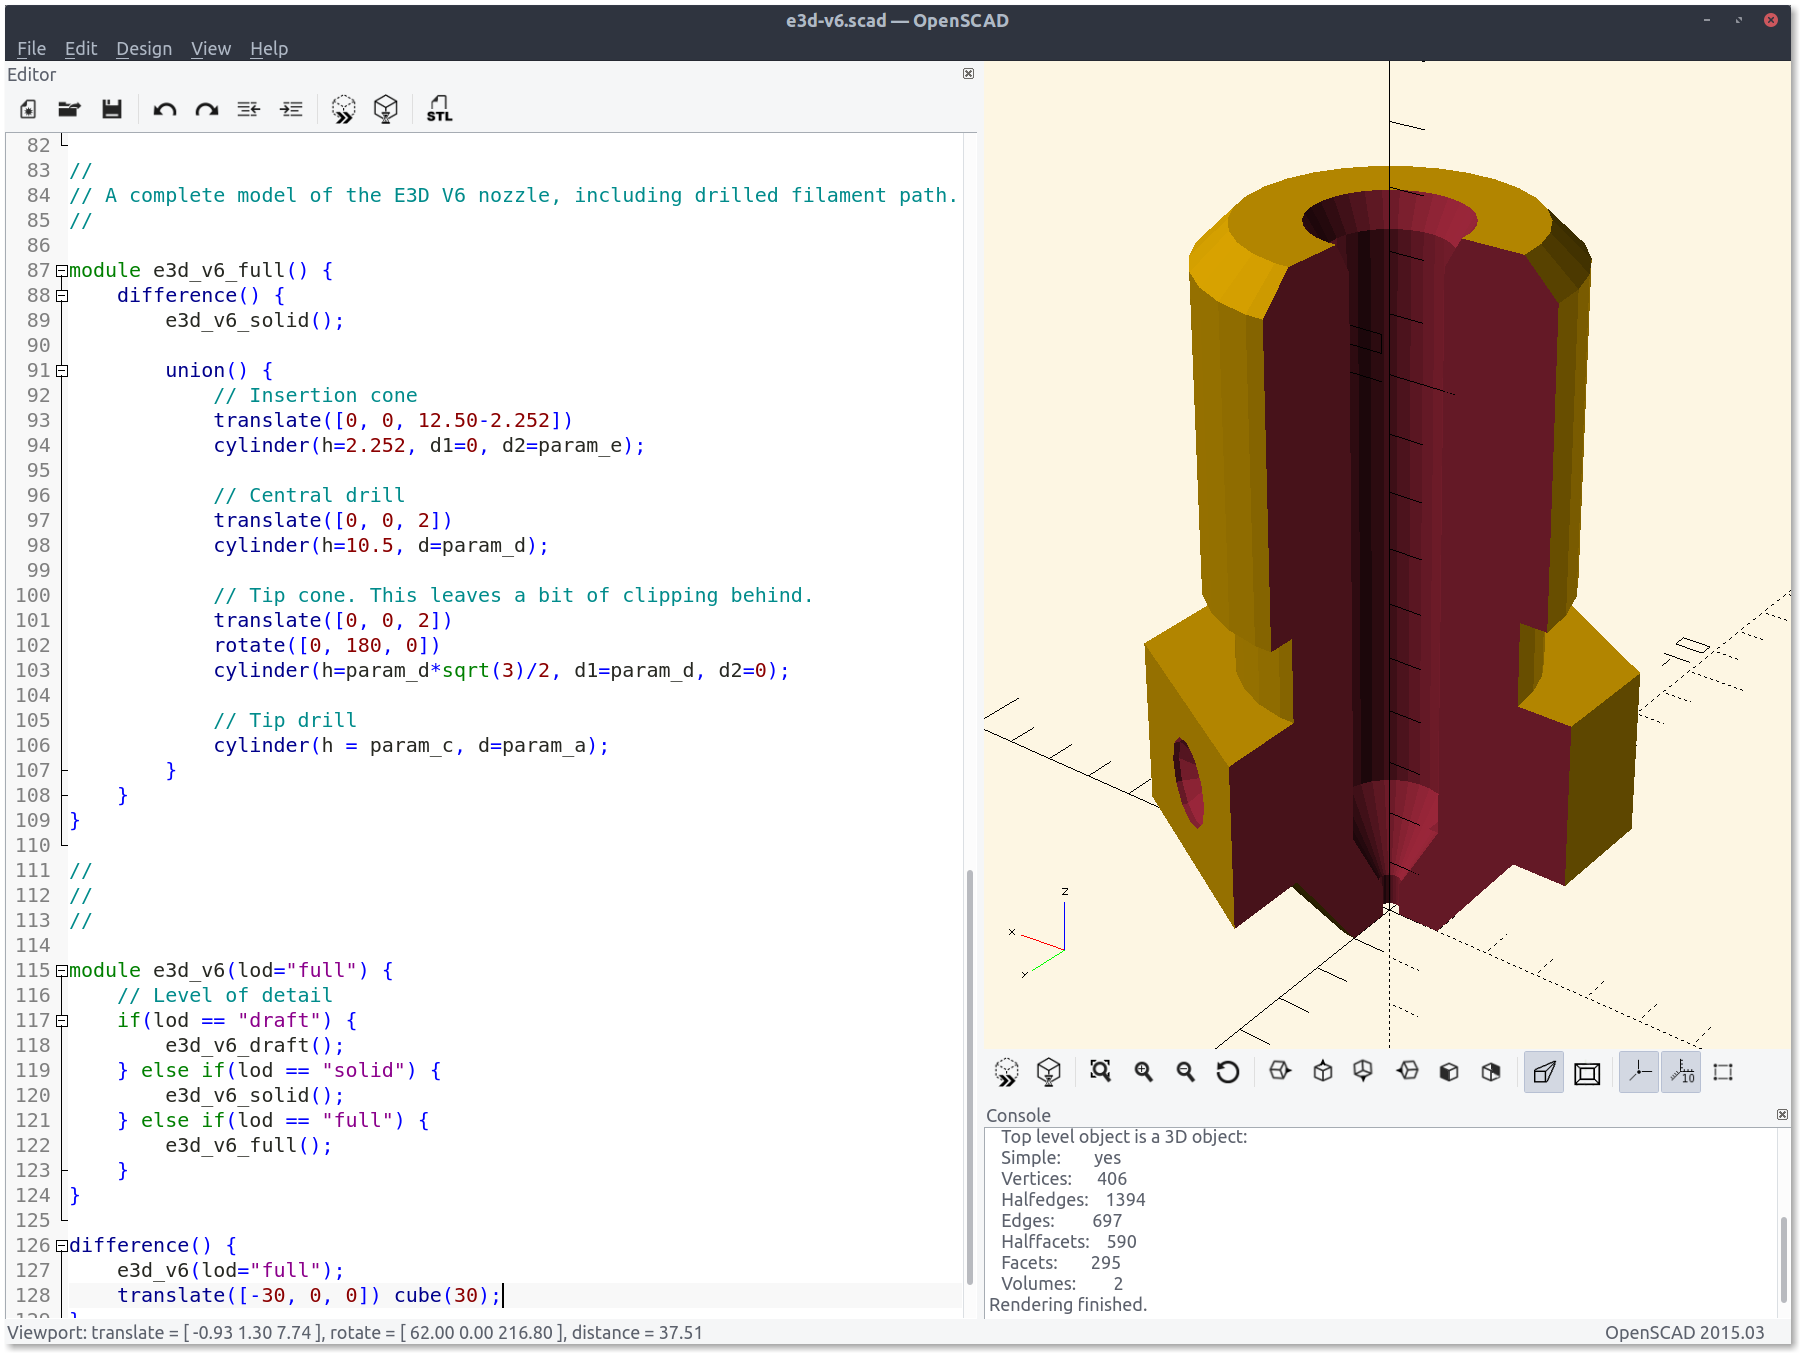
This model is parametric — there’s a few key variables at the top of the file that can be redefined to adjust the inlet (filament) and tip geometries. The default parameters are for a 1.75 mm filament and a 0.4 mm tip, the same as the nozzle that comes with the Prusa kit.
Radiation symbol cookie cutter
My partner is a radiation therapist, so I thought it would be nice to model and print a radiation symbol cookie cutter that I could then use for her birthday.
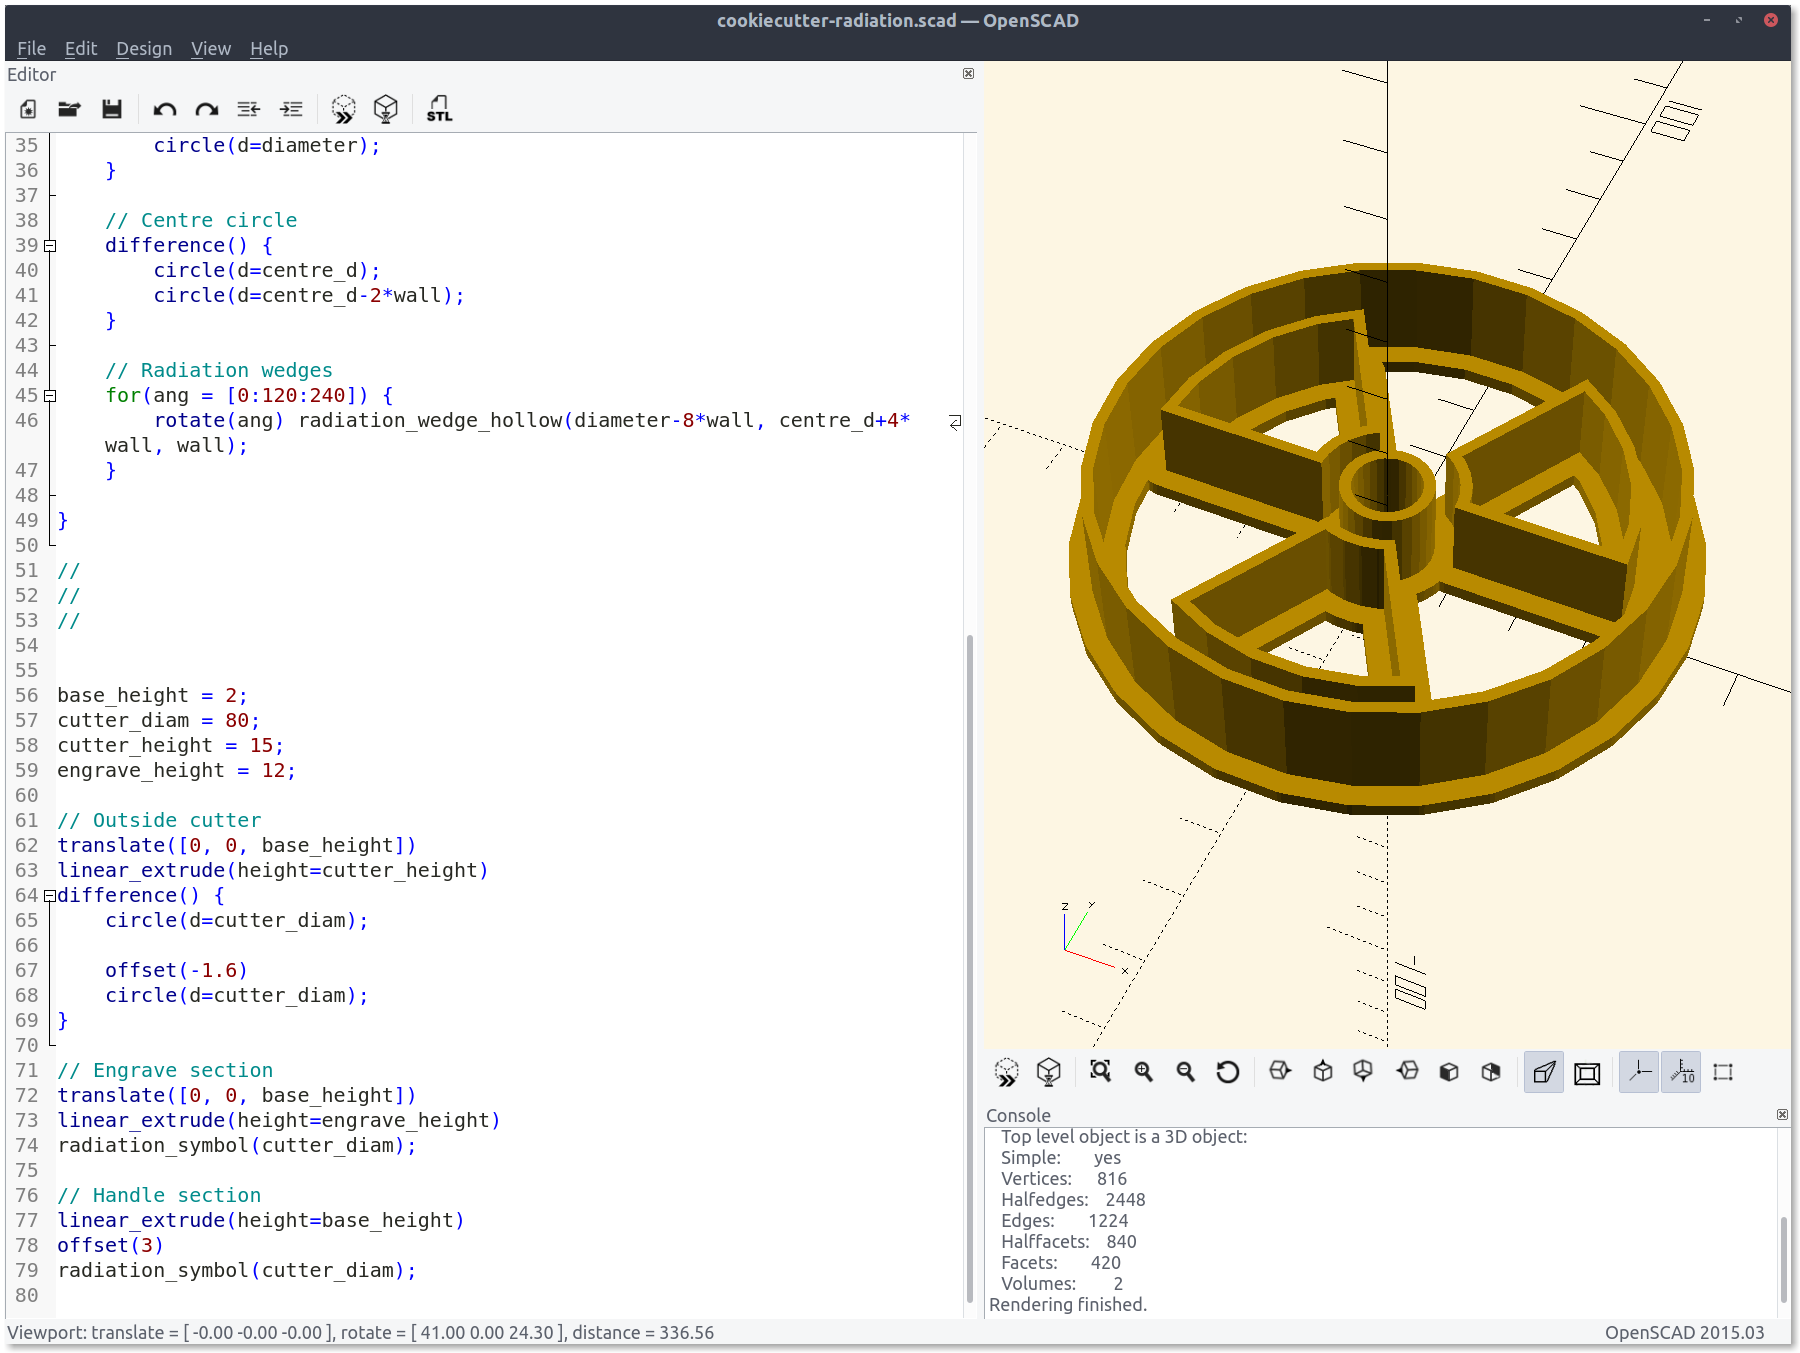
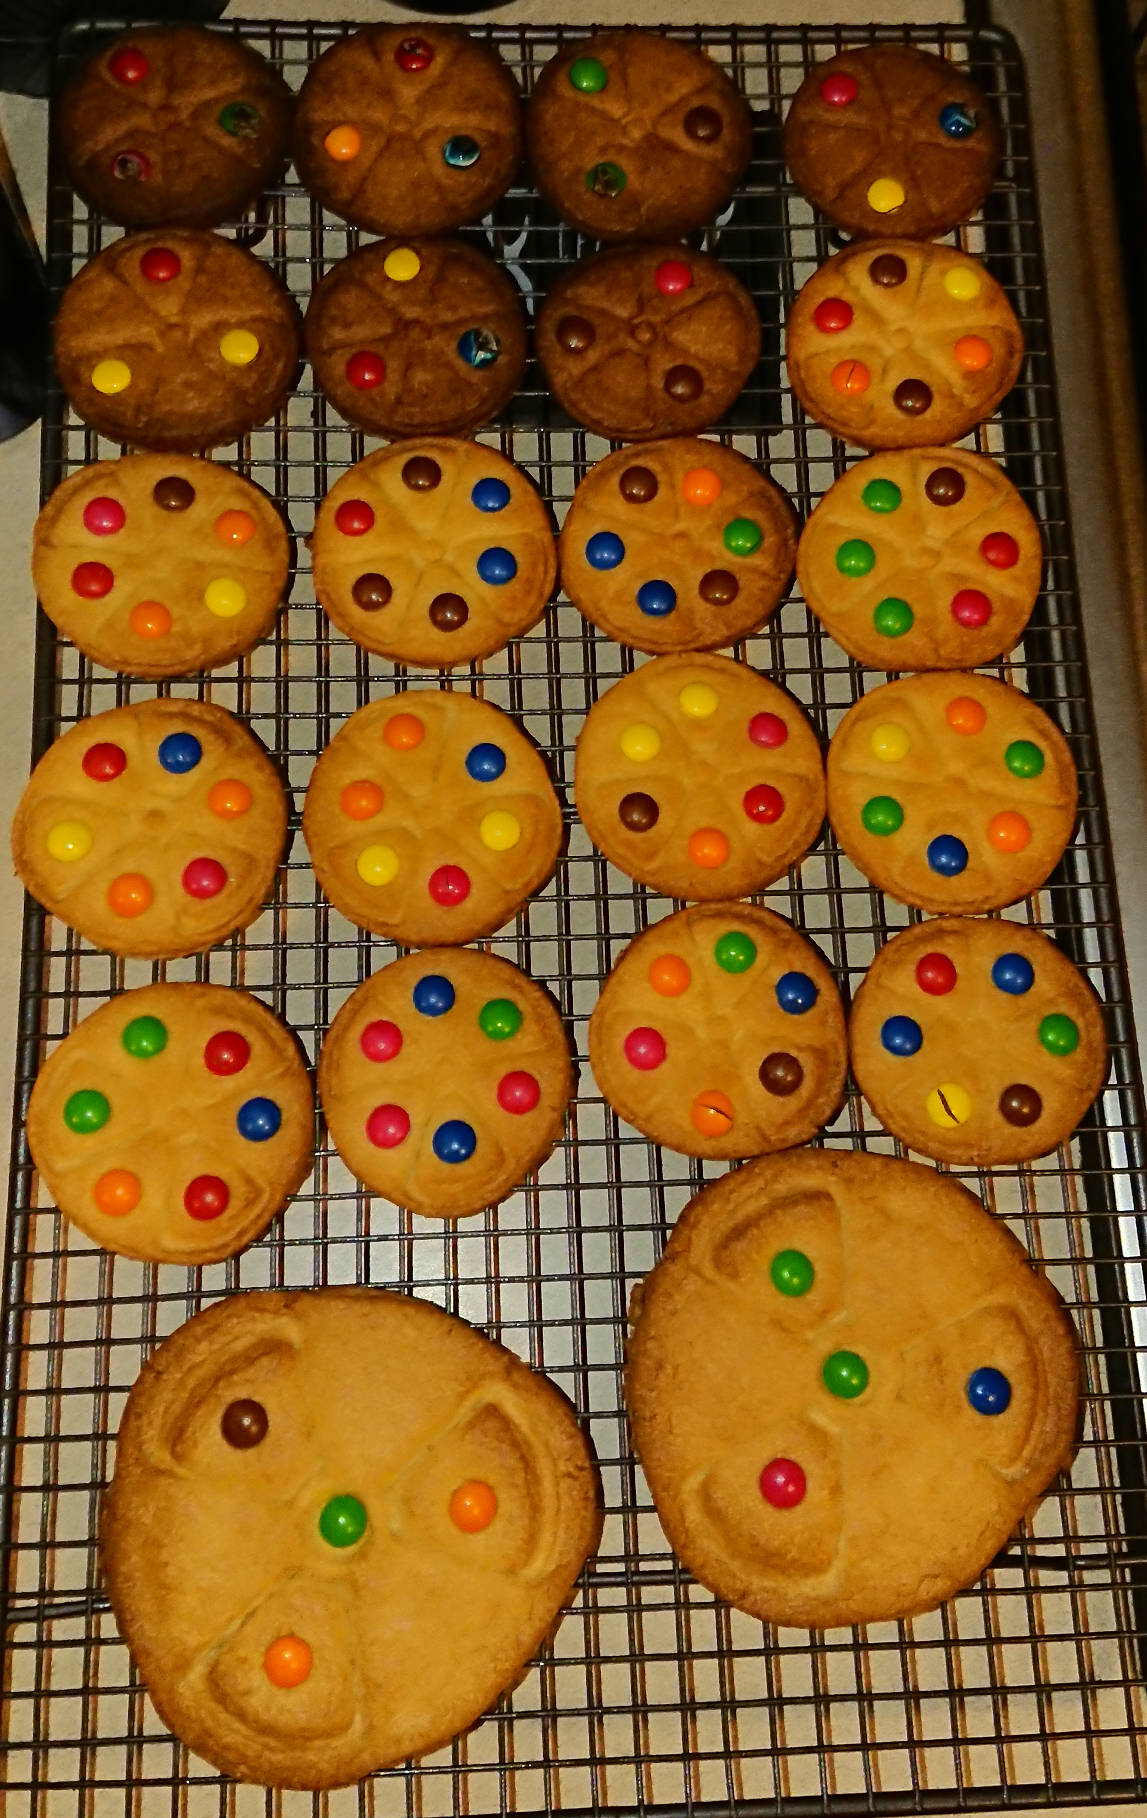
I printed two sizes, a 50 mm diameter version and an 80 mm diameter. When I went to use them for the first time, I found there were a couple of issues. Firstly, pressing cookie dough down to flatten it tended to make it very dense and hard when cooked, rather than light and fluffy.
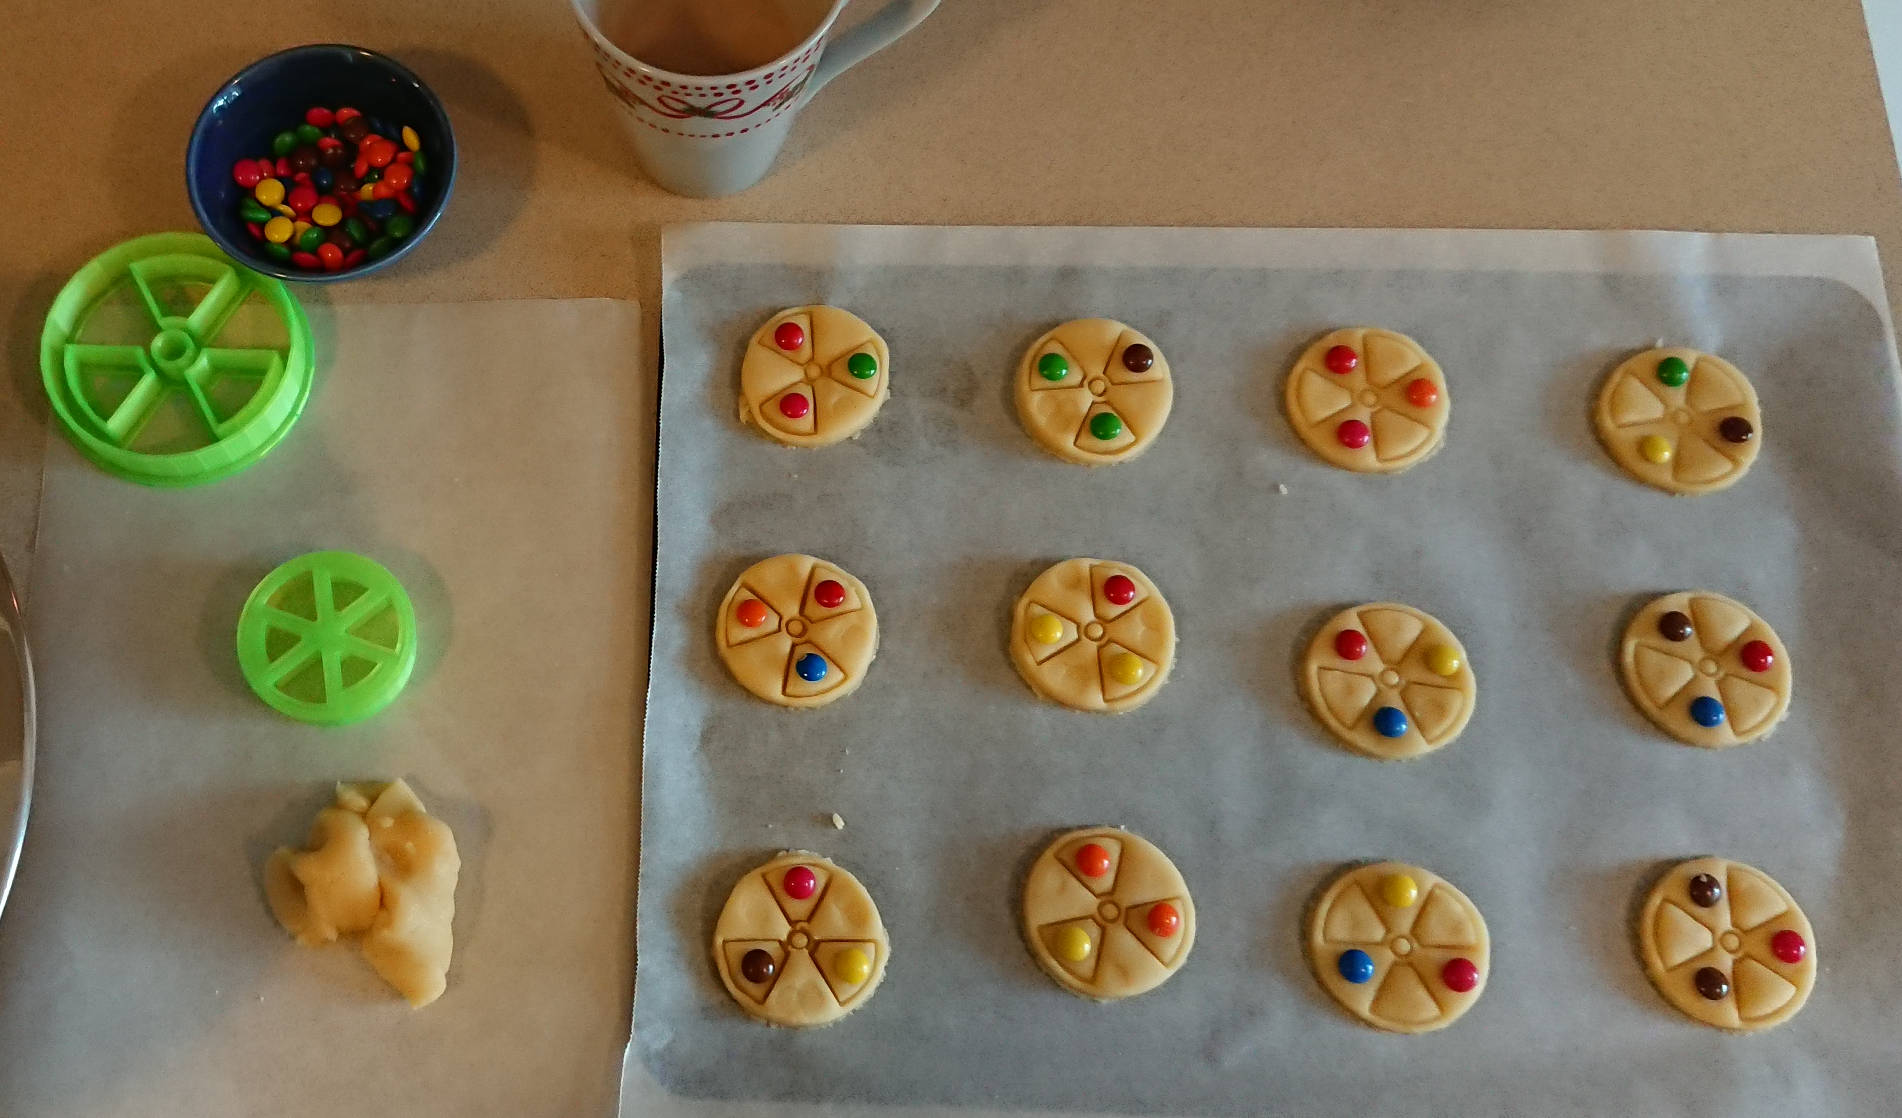
Secondly, the small gap between the edge of the cookie and the indent on the radiation wedges tended to make the wall fall away, rather than remaining upright. The last problem was, of course, that I simply overcooked them.
Keys
I’ve also modelled and printed… keys. With an interest in physical security, a box of old locks, and curiosity, I wanted to see how hard it would be to model and print keys from scratch. As it turns out, it’s worryingly easy.
Some $20 vernier calipers from the local hardware supply shop and a couple of hours of messing around in OpenSCAD produced the magnificent result below. Which is great and all, because it’s just a pretty picture, right? They’re purely decorative and won’t be able to harm anyone.
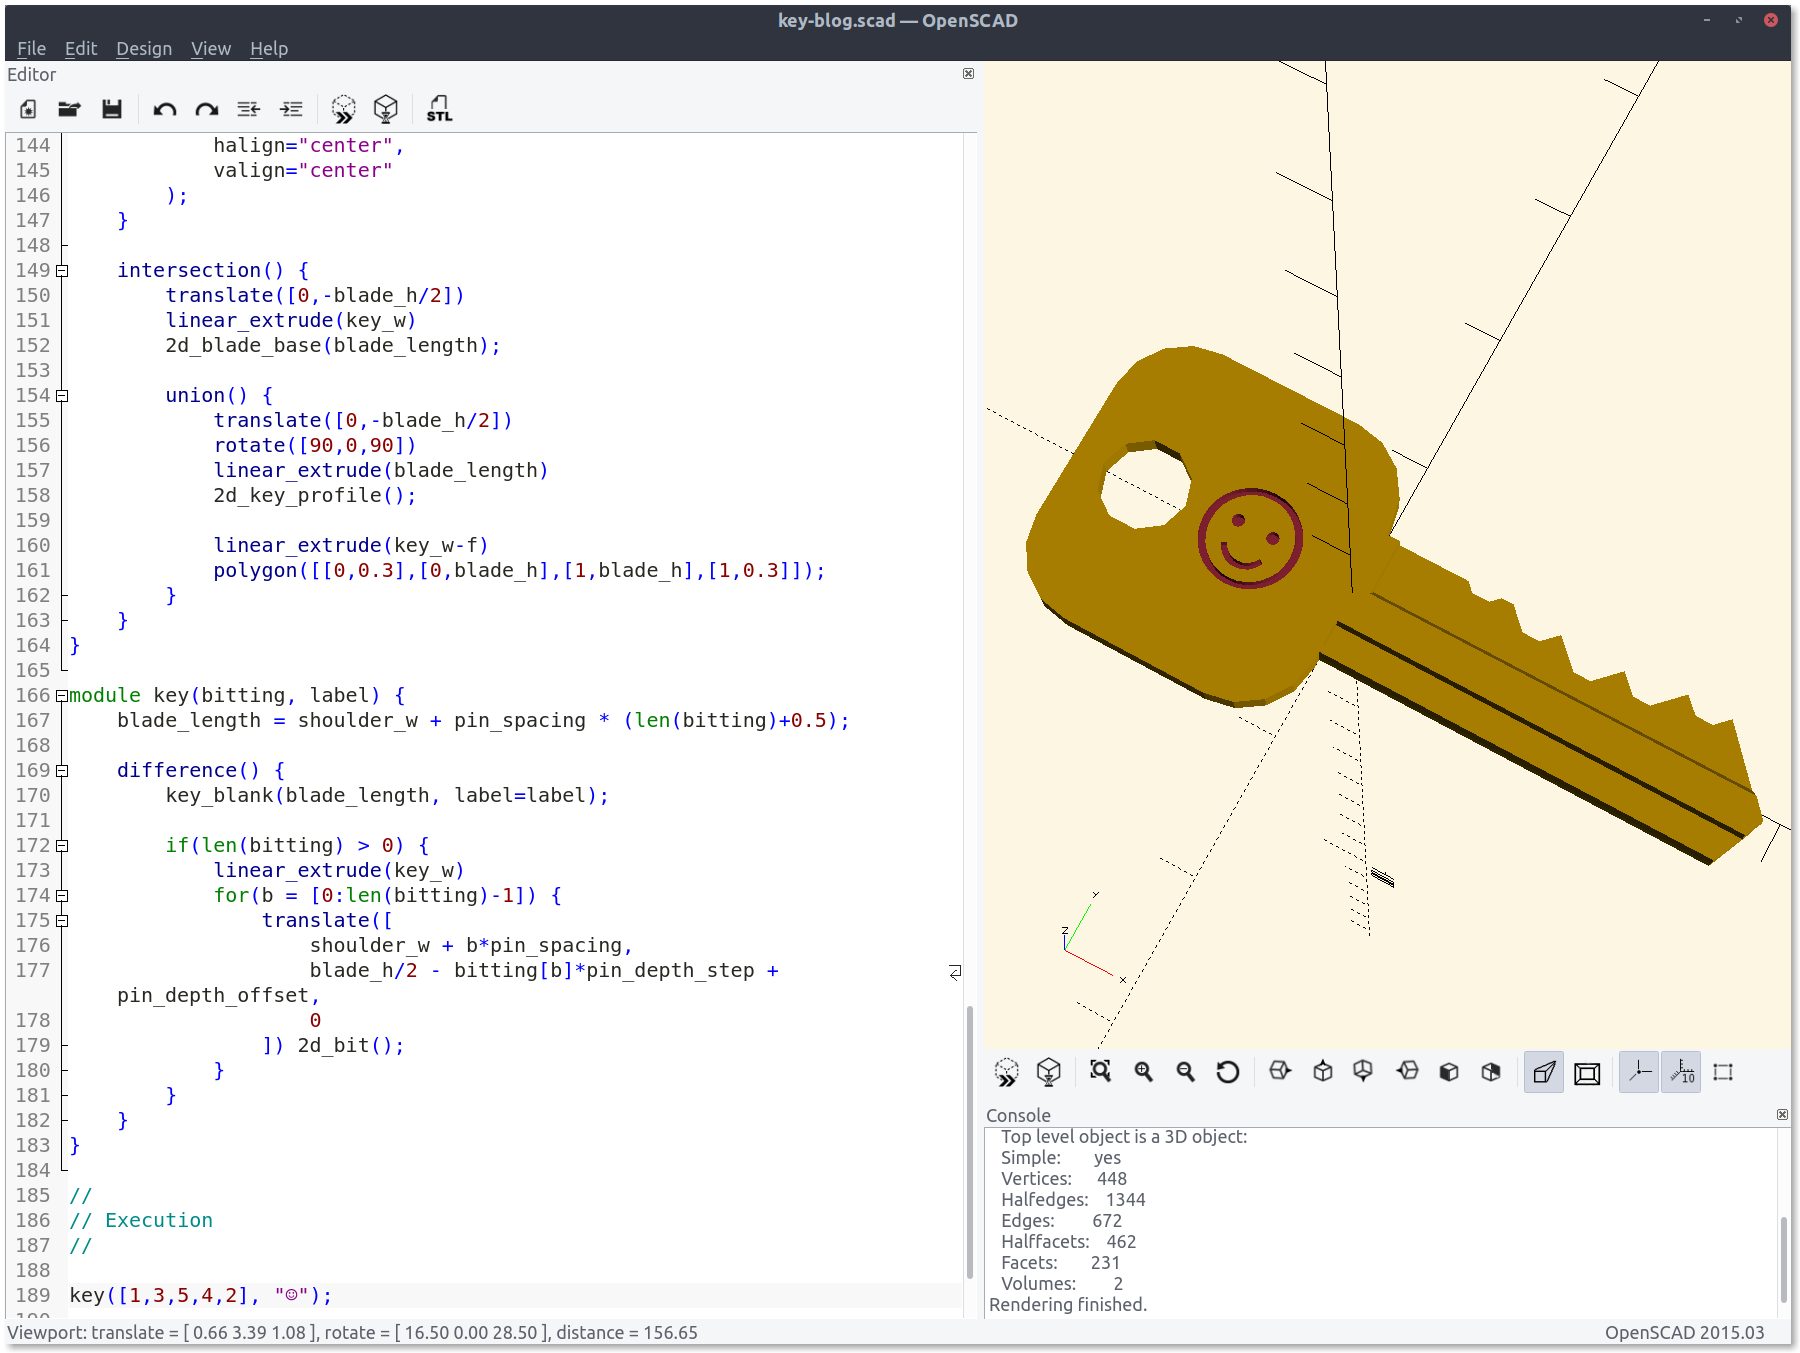
Not quite. As I had made it parametric, I could punch in the bitting code for any key that matched this profile. And they work. Ten minutes in the printer, a minute or so for the print to cool down, and then the keys just work in the lock without any post-processing steps.
Not that any of this is new. There are lots of examples of parametric key designs on Thingiverse already. It was just a surprise to me how easy it was to create my own.
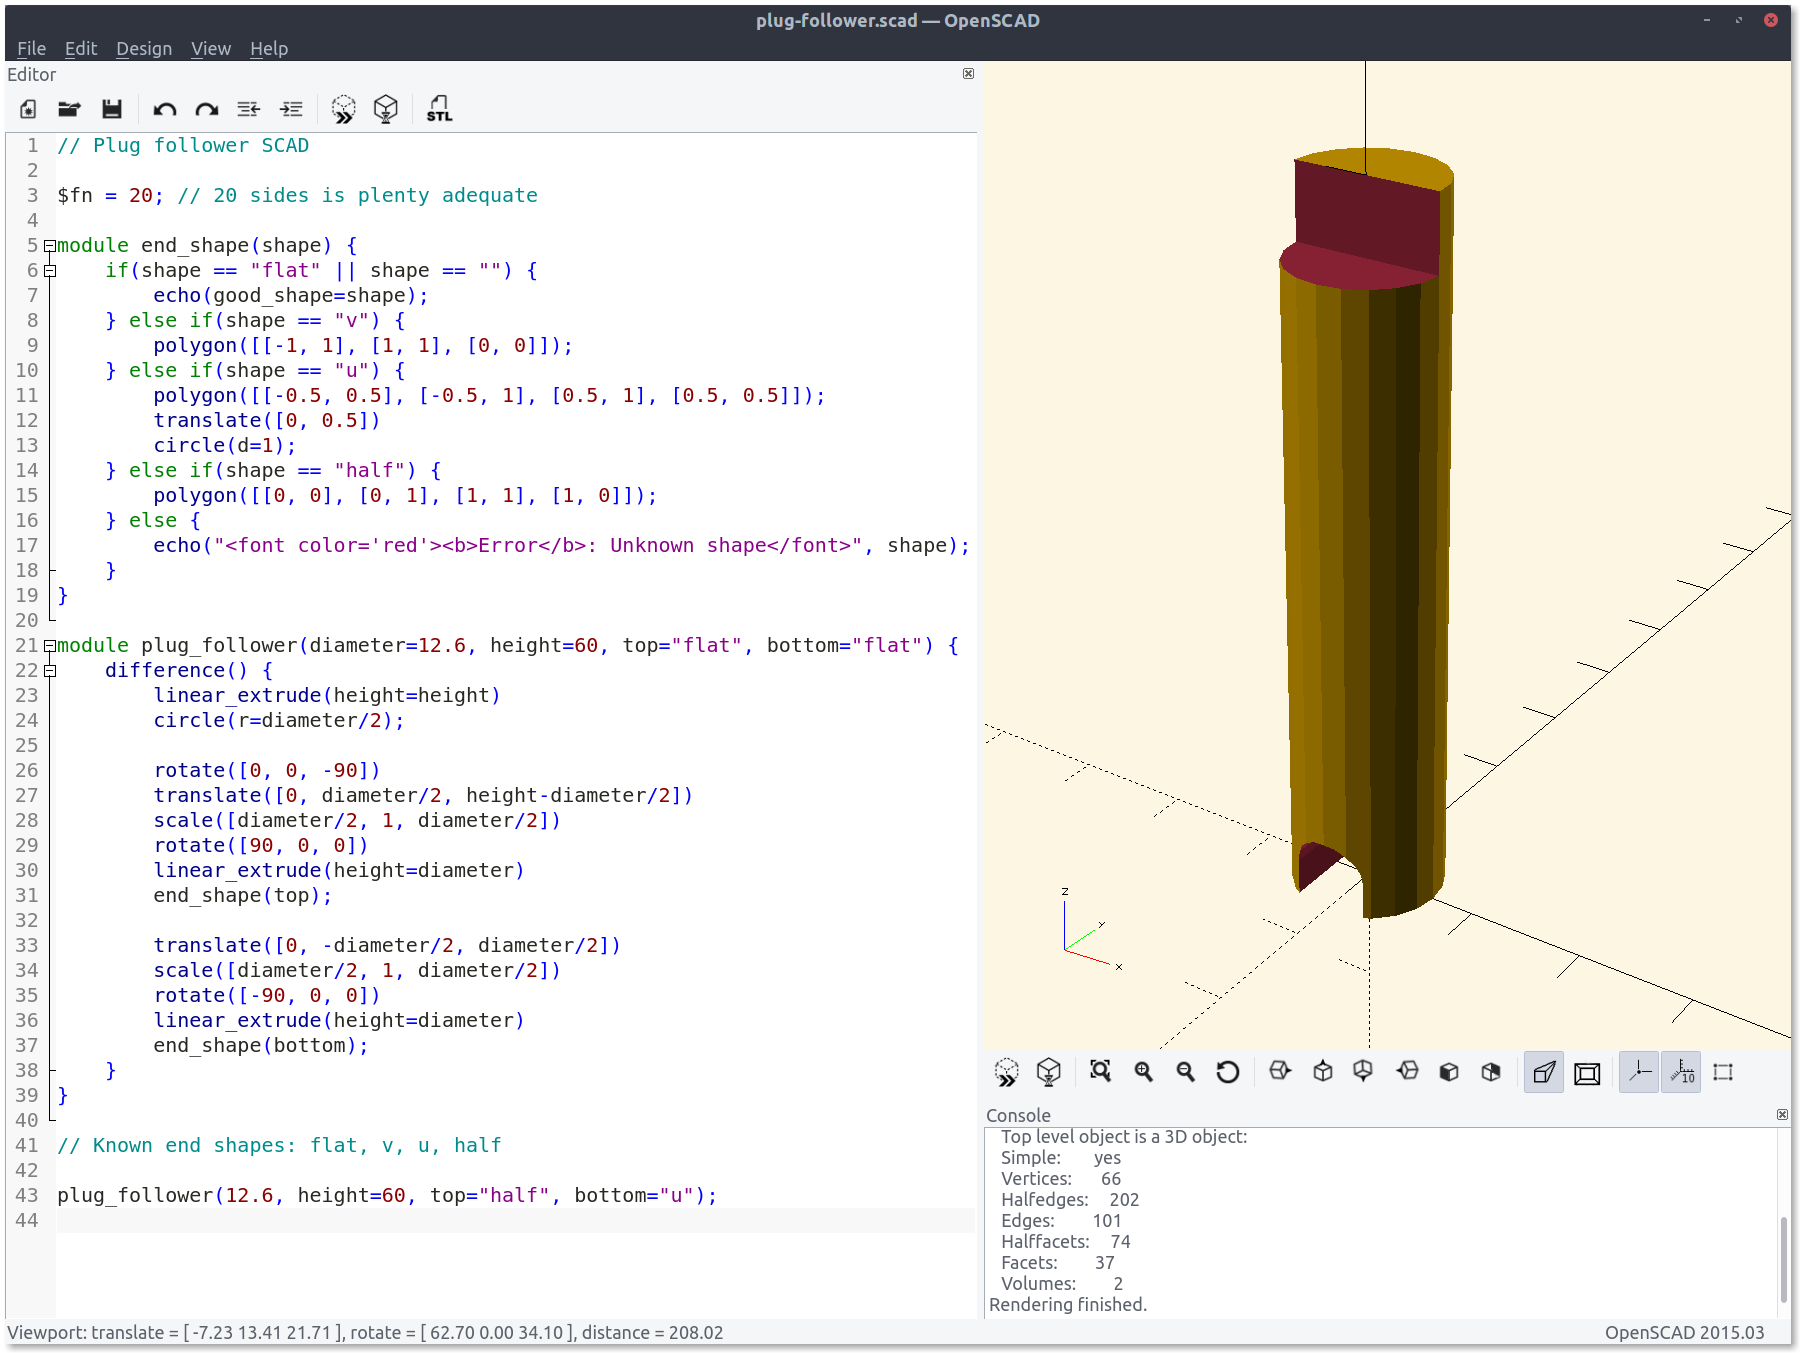
Plug followers
Continuing on the theme of locksport (aka “lock picking”), I modelled and printed some plug followers. These are used when you’re disassembling and ‘de-coring’ a lock, to keep the upper pins and springs in place while you change the key pins. Essentially they’re just a cylinder, but I got some practice with conditionals in OpenSCAD by making the top and bottom profiles parametric.
Other stuff
I made an ‘NFC token’ using one of the round NFC stickers I bought for a previous blog post. It was pretty straight-forward to model, just a short flat cylinder with a smaller cylinder subtracted from the middle of it. I didn’t even do anything smart with the slicing to make it pause; I just watched it and hit pause in OctoPrint when it started to make the hole.
I made a name-tag for my partner at her work; this was a fun one, because I wanted to include her employer’s logo. I couldn’t find any vector graphic versions of it online, so I resorted to downloading a full-colour JPG of it and processing it in GIMP and then Inkscape to get the outlines as a DXF that OpenSCAD could then import.
There’s been a couple of other things I’ve designed here and there too, but not really much worth writing about.
What’s next
Prusa3D have a sale on at the moment to celebrate hitting 100,000 sold printers, offering free international shipping on all Original Prusa i3 MK3S kits. This was enough incentive for me to stop thinking about buying one and to instead actually buy it, so my next post will likely be looking at what I ordered (and maybe how assembling it went, depending on how soon it arrives).