Slack for push notifications
Following on from my post about Push notifications with Python, I’ve recently been looking at using Slack for more advanced notifications and interactions.
This post will go through the process from the start, including setting up a Slack workspace and making a new App integration. If you’ve already done part or all of this stuff, feel free to skip ahead!
Creating a new Slack team
Making a new Slack team is free and easy! There are a lot of steps here, but they’re all quick.
- Go to the getting started page on Slack and click ‘Create a new workspace’.
- Enter your email address and click ‘Confirm’. This email address will become the ‘primary owner’ for the team automatically (but this can be changed later).
- Slack will email you a code. Type the number into the boxes on the webpage, and it should automatically move you to the next step.
- Enter the name for your Slack team and click ‘Next’.
- Slack will ask for the name of a project you’re working on — just make one up if you don’t have one. I used “Example project”. Click ‘next’ and Slack will show some confetti and give you a bit of information about what you just did.
- After you click ‘See Your Channel in Slack’, you’ll be taken to the Slack web interface where you can start to use Slack.
At the top of the page, you should see a nice banner letting you know that you can start to use Slack immediately. There’s also a green button that says “Save Your Account” - click it and follow the next set of steps.
- You’ll be prompted for your full name and a password to use to secure your account. When you’re ready, click Next.
- You can choose to change the workspace name or URL here — this is the best time to change the URL if you don’t like the auto-generated one.
- Now you can choose to invite other people to your team by email address. There’s also a convenient checkbox below, where you can let people join by themselves if they have an email at your domain. I’d recommend ticking this.
- Click ‘Finish’ when you’re done, and Slack will sort out the rest.
Setting up an integration
Creating a new App
Now we can start to set up an integration that will let us post messages into our new Slack team:
- Once you’re logged in, go to the Slack API documentation site. In the middle of the banner at the top is a big, green ‘Start Building’ button. Click it.
- You’ll now get prompted to create a Slack app. Enter an app name (it can be changed later) and pick the workspace we just made as the “Development Slack Workspace”. Click ‘Create App’ when you’re ready.
You’re now at the dashboard for your new app. There’s a lot of choices and options here, don’t be overwhelmed! Before we can do anything cool, we’ll need to add some permission requests and install the app into our workspace.
Permissions and installation
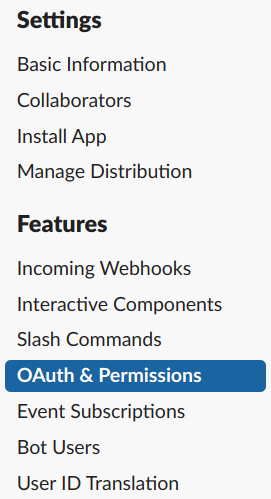
At the app dashboard, click ‘OAuth & Permissions’ in the sidebar on the left:
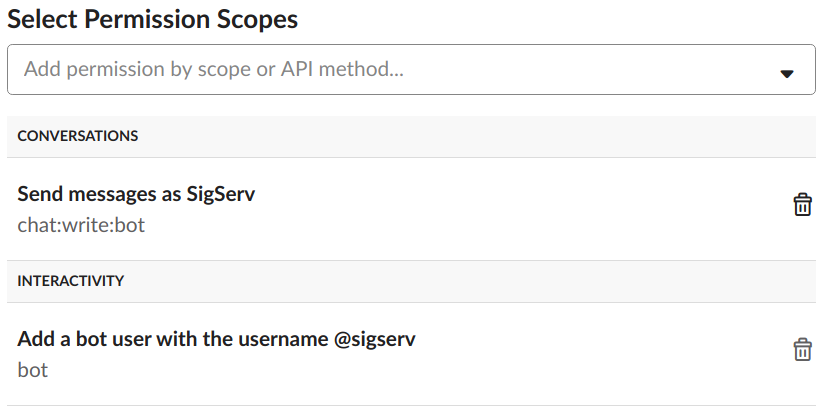
The ‘Scopes’ heading on this page is where we’ll be adding some Permissions to our app, which allows us to interact with Slack workspaces. I’d suggest adding:
-
chat:write:bot, so you can send messages straight to public channels -
bot, as this covers a wide range of use-cases and allows for some more advanced functionality.
Click ‘Save Changes’ when you’re done. The next link in the sidebar we’ll visit is Bot Users. On this page, click ‘Add a Bot User’. The default values should be sufficient here. Click ‘Add Bot User’ at the bottom to save the configuration.
Lastly, navigate to the Install App item in the navigation menu on the left. Here, click ‘Install App to Workspace’ and then ‘Authorize’. You’ll be given a couple of access tokens; make a copy of these somewhere secure as we’ll need them to connect to Slack and send messages.
Tip: Treat these access tokens like passwords. They are the ‘keys to the kingdom’ for your bot and can grant read and write access to pretty much your entire Slack workspace. Don’t commit them to git and be careful where you paste them.
Sending your first messages
Here’s some simple Python code using the Slacker module that will get you up and running with posting messages into a channel (here I’m using #general). You’ll need the ‘Bot user access token’ given to you in the last step.
from slacker import Slacker

slack = Slacker('xoxb-BOT-TOKEN-HERE')
slack.chat.post_message('#general',
    "Hi sigsec readers! I'm your first Slack integration message :smile: :tada:",
    as_user=False)
slack.chat.post_message('#general',
    "This time I'm sending with `as_user=True` :robot_face:",
    as_user=True)
Here’s how it looks in the Slack app! You can see I’m already including some basic formatting; the documentation and message builder are awesome resources.
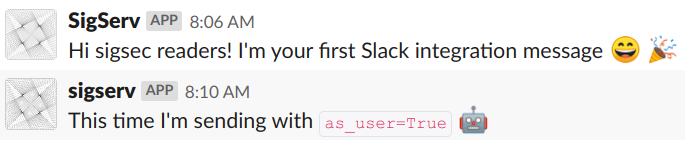
The difference between the two messages is the value of the as_user parameter. At this early stage the difference is mostly cosmetic, but there are some differences behind the scenes that will become important later.
- When
as_user=False, the message will be sent by your app integration (part of thechat:write:botscope) - When
as_user=True, the message will be sent by your bot user (part of thebotscope)
Tip: Bot users can only post into channels that they have been invited to. If the bot user isn’t in the channel you’re trying to post to, Slacker will fail with an error.
Next steps
From here, the Slack world is your oyster! With these basic steps, you can take your integration wherever you like. You could write success or status notifications for tasks that you’d like to automate. As an example, I added a job to Jenkins that sends me a message with the weather forecast every morning.
An upcoming post will go into detail on how I accomplished this, as well as how you can use more advanced formatting in Slack messages.